
Building Apps
Buffer's API lets you build third-party applications that integrate with other tools and extend Buffer's core functionality. Users can connect their Buffer account to your app, and from then on the app acts on their behalf. This opens the door for new integrations, advanced features, and new interesting use cases.
This guide covers the key aspects of creating third-party clients on Buffer: from registering an app client all the way to important considerations you should take into account when running apps in a production environment.
Personal Access Tokens vs App Clients
Buffer has two kinds of credentials, and which one you need depends on who the end user of the implementation is:
| Personal Access Token | App client | |
|---|---|---|
| Acts for | You, the person who created it | Any user who connects their account |
| Good for | Personal scripts, internal automations, one-off workflows | Apps other people sign in to |
| How it authenticates | A key in the Authorization header |
OAuth 2.0 Authorization Code flow with PKCE |
| Setup | Create a key and use it | Register a client, then each user approves it |
So if you'd like to build apps or integrations that other people will use - you should build an app client. If, on the other hand, you are building something only you will run, a Personal Access Token is a better option. Check out Authentication for more detail.
Registering an app client
Before writing any code, the app needs an identity in Buffer and permission to ask users for access. That is what an app client is: the app's identity, the permissions it is allowed to request, and a pair of credentials, a client ID and a client secret, that identify the app to Buffer.
To register a client open Settings → API in Buffer and select the App Clients tab.
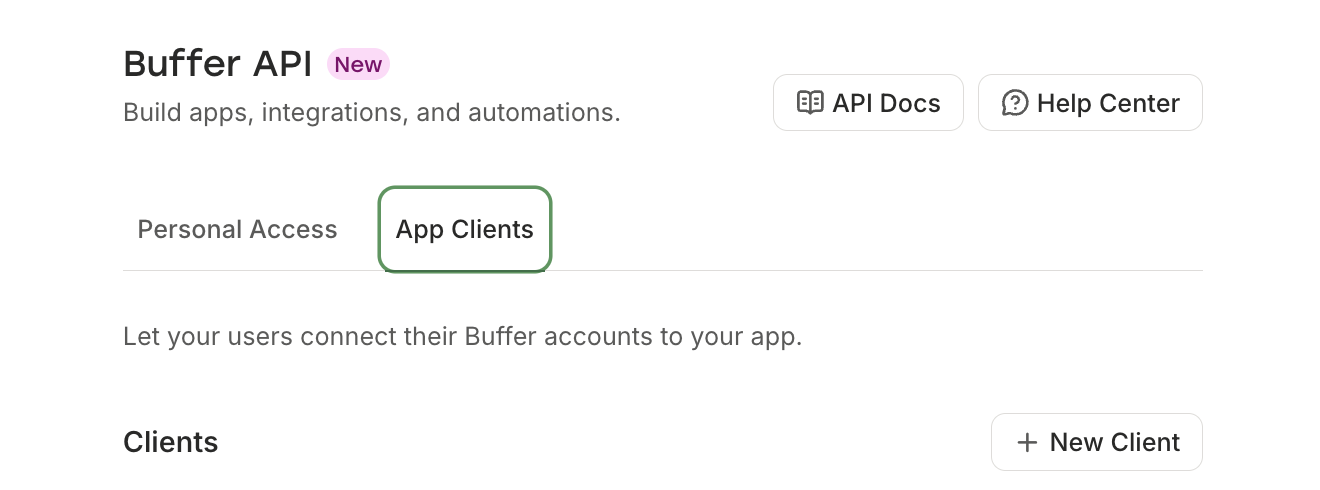
Click New Client and fill in the details.
Name. Your app's name, shown on the consent screen. This is what a user sees when they decide whether to trust your app, so use the name they know it by.
Logo. Optional, also shown on the consent screen.
Privacy policy link. Optional but worth adding. It tells users how your app handles their data, and they are asked to approve it alongside the permissions.
Public or private client. This decides whether your app gets a client secret. Choose public when your code ships to the user, as it does for mobile, desktop and single-page apps: those clients get no secret, and PKCE authenticates them instead. Choose private when your app has a server of its own that can keep a secret.
Permissions. The scopes this client is allowed to request. Enabling one here does not grant it. It only decides what the client may ask for; the request happens at authorization, and the user sees what you asked for on the consent screen. Ask for the narrowest set that makes your app work, because every extra permission is something a user has to agree to. For example:
Scope What it grants account:readView account info, organizations, channels account:writeUpdate account settings posts:readView posts and the queue posts:writeCreate and manage posts ideas:readView ideas ideas:writeCreate and manage ideas snippets:readRead access to snippets snippets:writeCreate and manage snippets Redirect URI. Your app's return address, and where Buffer sends the user once they approve your app.
Buffer only redirects to URIs you register in advance and compares them character for character, so a few rules follow:
- A trailing slash, a different port or a different subdomain makes it a different URI.
- The URI has to match in both the authorization request and the token exchange.
- HTTPS is required, including on localhost. Local development needs a certificate, usually a self-signed one.
- A client can hold several URIs. You can register a localhost URI for development and a public URI for production, and keep both.
Here is an example of what the configuration can look like:
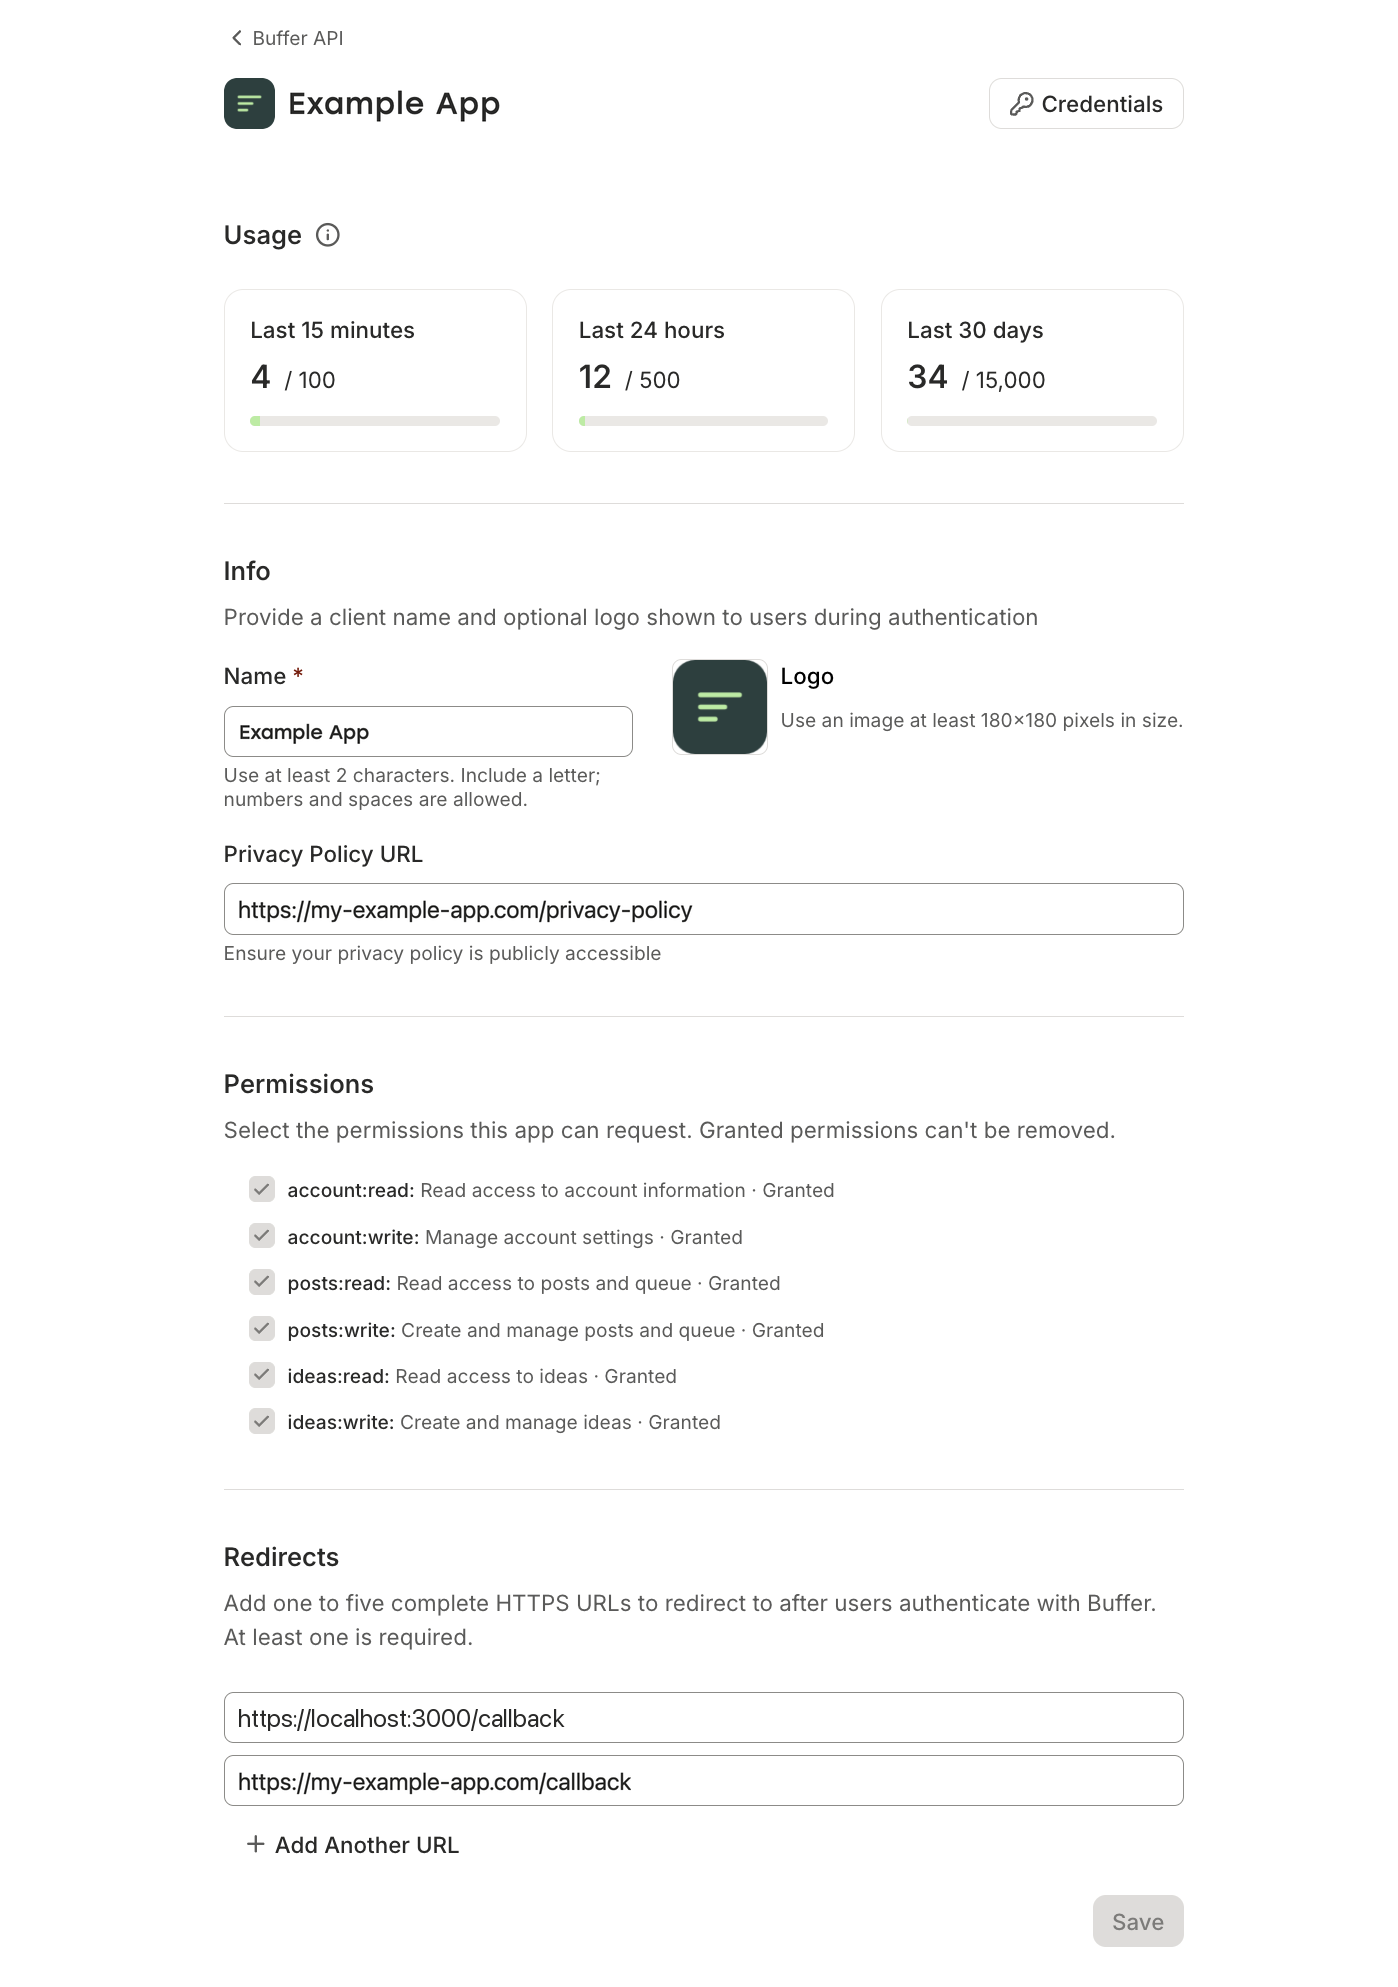
Save the configuration and you will get your app's credentials - a client ID and a client secret.
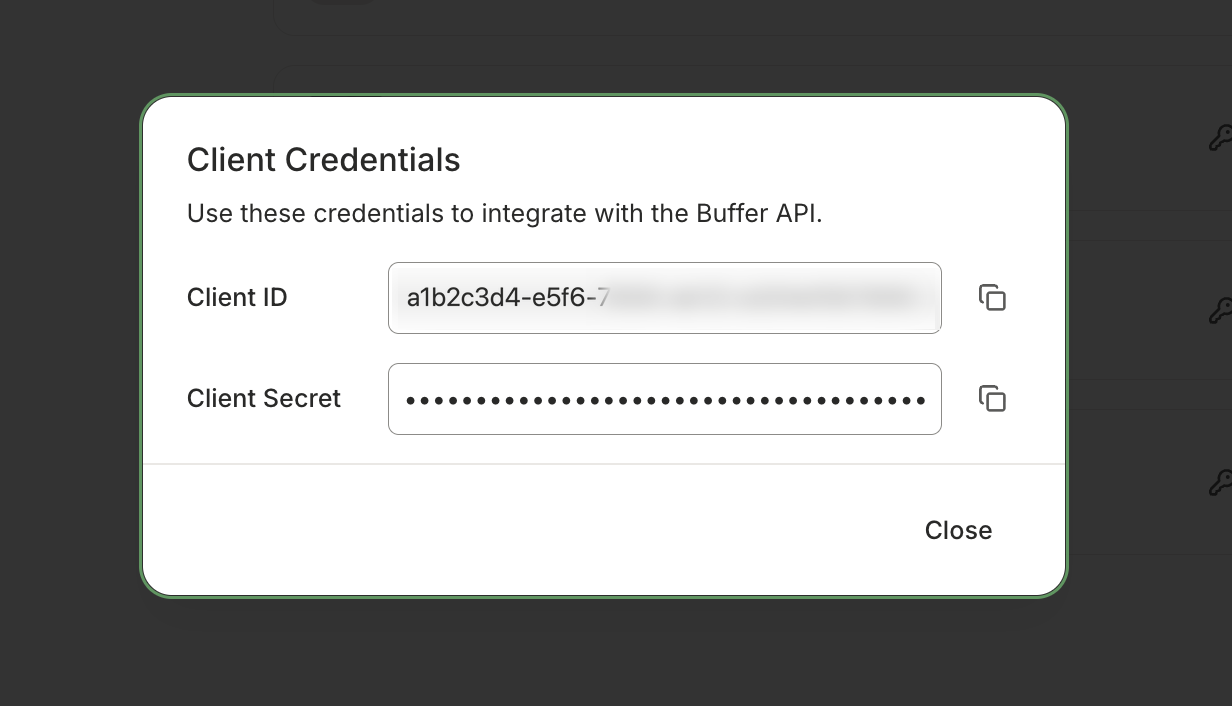
Copy both and put the secret somewhere safe. It is what lets your server exchange authorization codes for tokens, so treat it like a password: keep it out of version control, make sure it doesn't reach the browser, and rotate it in these settings if it leaks.
How connecting an account works
Here's what the authorization flow looks like under the hood. In short, your app sends the user to Buffer to approve access, Buffer sends them back with a one-time code, and your server swaps that code for an access token. From then on your server uses that token when it calls the API.
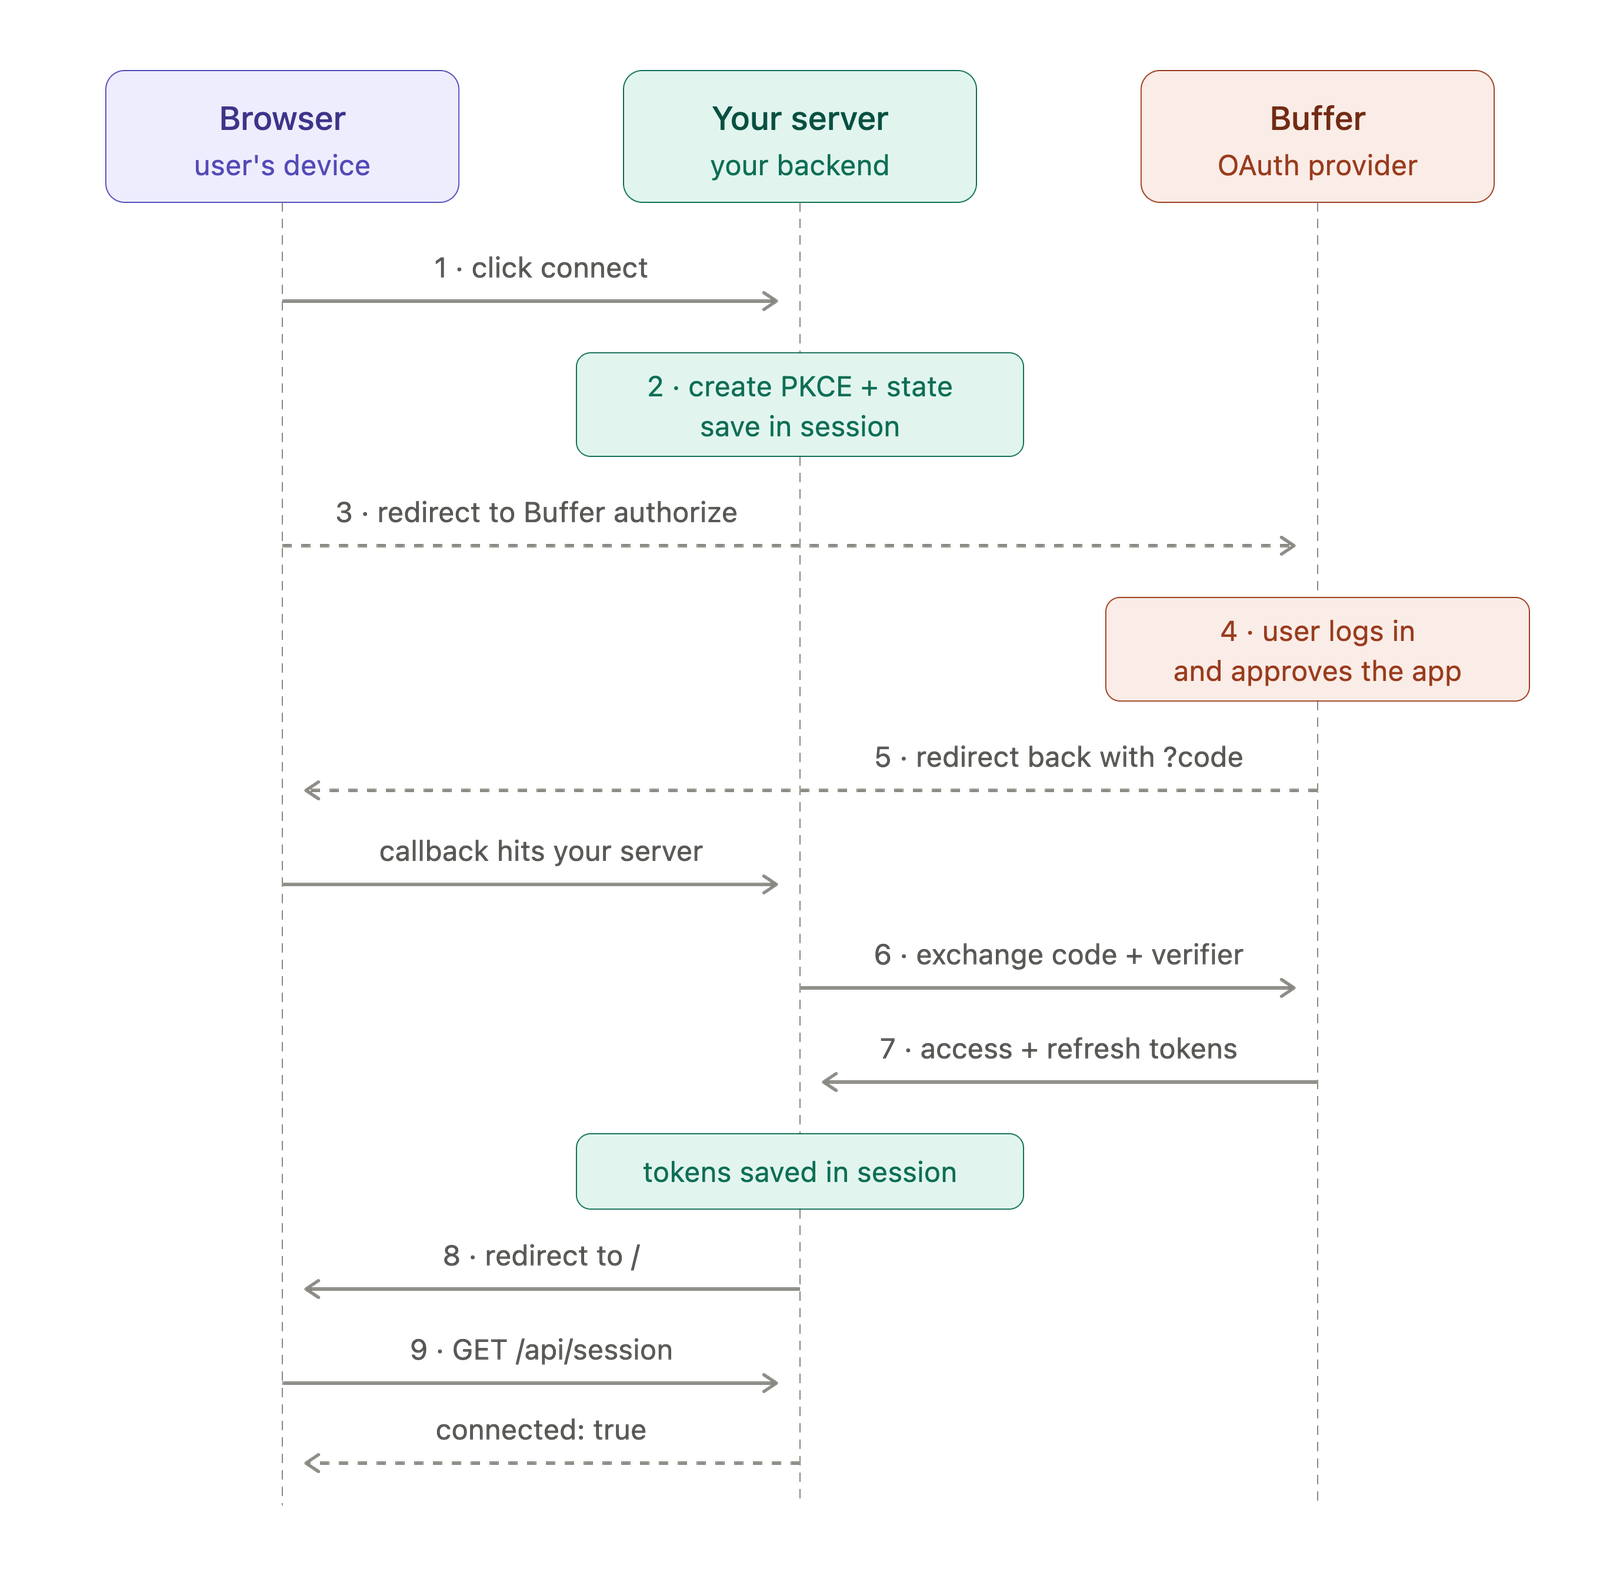
Two values protect the round trip, and both are generated fresh for every authorization:
stateis a one-time receipt. Your server sends it out when the user clicks Connect and expects the same value back. If it differs, the return trip did not begin with your app, and the request should be refused.- PKCE gives your server a secret answer to a question it asked at the start. The answer, the code verifier, stays on your server; Buffer only sees its hash until the code is exchanged. Somebody who steals the returned code cannot exchange it without the verifier.
Step by step:
- The user clicks Connect, and the browser calls your server.
- Your server creates the PKCE pair and the
state, and saves both in the session. - Your server redirects the browser to Buffer's authorization URL, carrying the
stateand the PKCE hash. The verifier stays behind on your server. - Buffer signs the user in if needed and asks them to approve the permissions you requested.
- Buffer redirects the browser back to your redirect URI with a one-time code and the
state, and that callback hits your server. Check thestateagainst the saved value here, and stop if it does not match. - Your server sends the code and the saved verifier to Buffer's token endpoint.
- Buffer returns an access token, plus a refresh token if configured, and your server saves them in the session.
- Your server redirects the browser back to your app, now connected.
- The page asks your server whether it is connected, and gets back the account it is now acting for.
Step 4 is the only part the users actually see as they are presented with the consent screen to authorize the redirect URI and grant the permissions to their account:
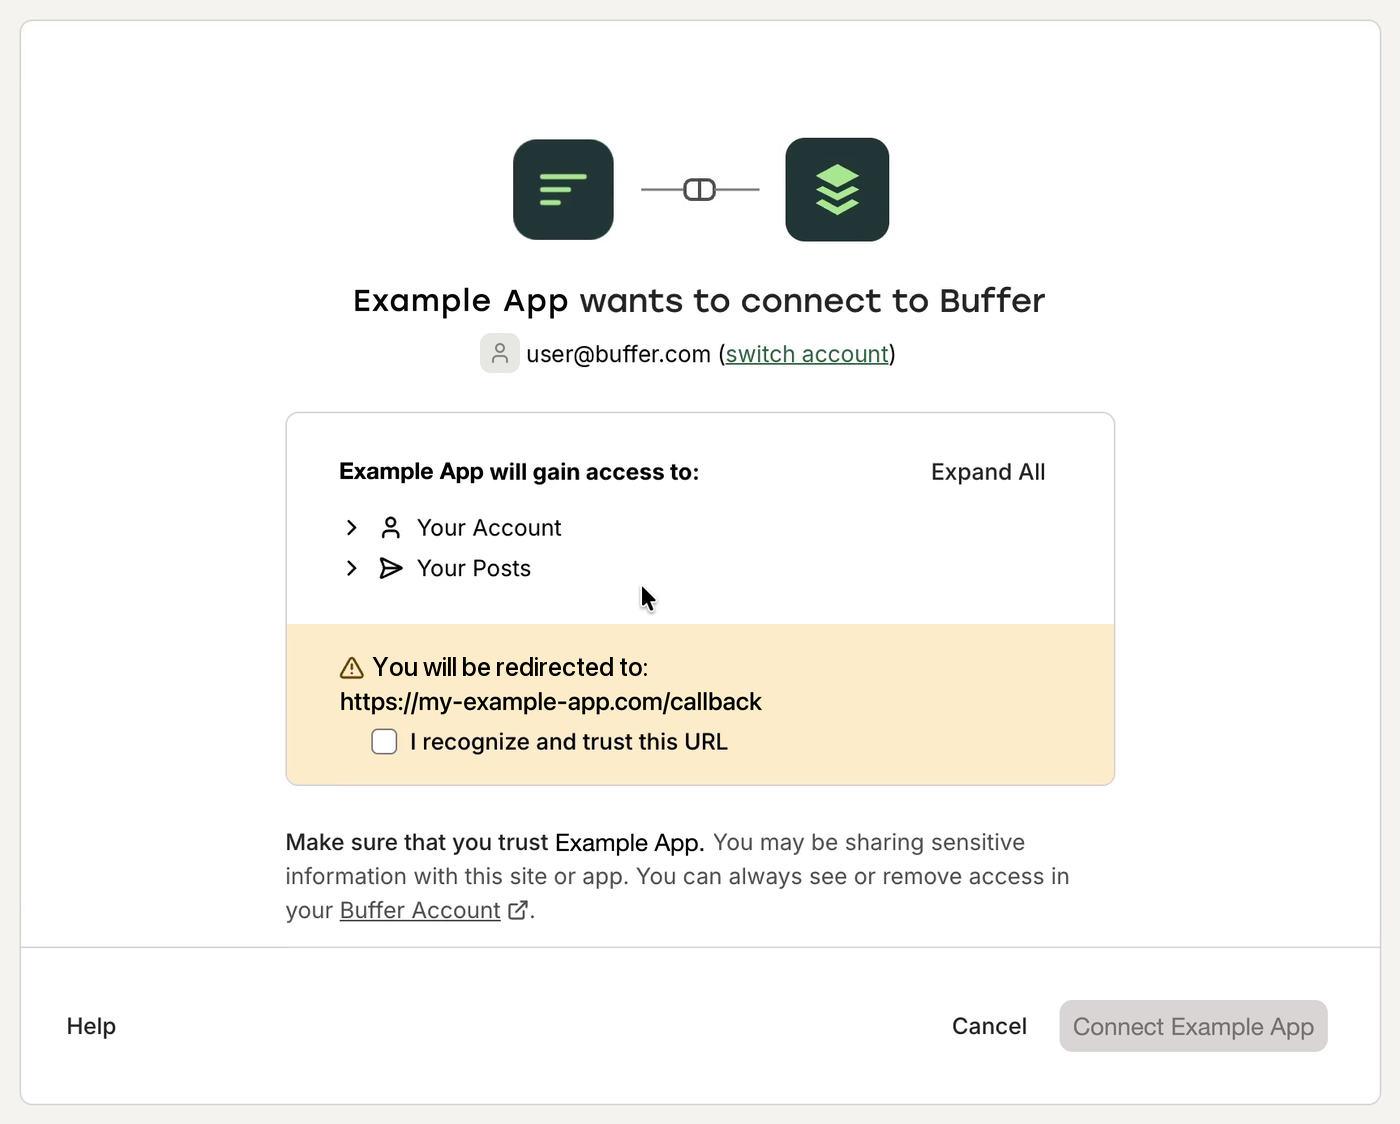
Authentication covers the actual requests for each of these steps, and includes code examples for generating the PKCE pair and what the token response contains.
Configuring your app
An app needs four things at runtime, and all of them differ between your machine and production, so read them from the environment rather than writing them into the code.
# Your app client, from https://publish.buffer.com/settings/api
BUFFER_CLIENT_ID=your_client_id
BUFFER_CLIENT_SECRET=your_client_secret

# Must match what you registered, character for character
REDIRECT_URI=https://localhost:3000/callback

# Encrypts or signs whatever holds the user's session
SESSION_SECRET=

PORT=3000BUFFER_CLIENT_IDandBUFFER_CLIENT_SECRETcome from the client you registered. A public client has no secret and uses PKCE alone.REDIRECT_URIhas to be identical to a URI on the client. A value that accidentally picks up a second line, or a stray space, produces a generic "could not connect" page on Buffer's side rather than a useful error, so it is worth trimming and logging the value your app actually sends.SESSION_SECRETprotects the session your tokens live in. Generate a real random value for production, keep it stable while the app runs, and use a different one per environment. Changing it signs everyone out, which is the right response after a suspected leak.
Never share the environment configuration file in public. Keep it server side and use secret management tools for production deployments.
Working with tokens
A successful exchange gives you tokens needed to manage user access.
The access token is short-lived. It is good for about an hour, and it is what goes in the Authorization header on every API call. When dealing with access tokens, store the moment the token expires rather than the duration you were given, and subtract a small margin so a token does not run out while a request is in flight.
The refresh token is long-lived, and only arrives if you configure the required scope server-side. Include offline_access in the scopes on the authorization request and Buffer returns a refresh token alongside the access token. Without it, your app sends the user back through the consent screen every hour.
Three things about refresh tokens are worth knowing before you design around them:
- They rotate. Every refresh returns a new refresh token and invalidates the one you sent.
- Reusing an old one revokes the whole grant. The user has to authorize again, so the replacement has to be saved before anything else uses it.
- Concurrent refreshes collide. Two browser tabs, a retry, or two server instances can each try to refresh the same token. Whatever stores the token needs to be the one place that refreshes it.
Check out Authentication to see an example for refresh requset.
Where tokens should live
Tokens are credentials for someone else's account, so they belong on your server. Never put them in localStorage, sessionStorage, or a cookie that page JavaScript can read, and never send them to the browser.
An encrypted, HttpOnly session cookie is a reasonable place to start. Page JavaScript cannot read it, it needs no extra infrastructure, and it works on serverless hosts because every instance can decrypt the same cookie from a shared secret. The only limitation is that a cookie travels with each request independently, so it cannot coordinate the concurrent refreshes described above.
For anything carrying real traffic, move the tokens into a shared, durable store. A few architecture choices you can consider:
| Store | A good fit when | What it gives the OAuth flow |
|---|---|---|
| Managed Redis or a KV store | You want short-lived sessions, automatic expiry, and a small per-connection lock | Fast reads, expiry, and an atomic lock close to the application |
| Postgres or another relational database | Connections belong alongside users, audit records, and other product data | Durable records, transactions, and one place to query connection state |
| A shared OAuth broker | Several of your applications need to act for the same users | One OAuth client, an encrypted token vault, and audited server-to-server access |
Whichever option you pick, follow the provider's official guides for reference configuration.
Staying inside the rate limits
Finally, it's important to honor the API rate limits to ensure that your application runs smoothly and follows good API usage practices.
Every response tells you where your client stands. RateLimit carries the requests remaining and the seconds until reset, and RateLimit-Policy carries the quota and the window. Going over returns 429 Too Many Requests with Retry-After in seconds.
Two habits keep an app comfortably inside the limits:
- Wait out short resets and surface long ones. Sleeping through a long
Retry-Aftertrades a rate-limit error for a timeout, and serverless functions are billed by wall-clock time and cut off at a hard limit. - Cache what rarely changes. Organization IDs and channel lists are good candidates for holding onto for the length of a session instead of fetching them on every page load.
Rate limits and Efficient API Usage go into more detail.
Taking an app to production
Production changes the environment around your app rather than the app itself. TLS is usually terminated by the host, the filesystem may be read-only, and more than one instance may handle requests. Buffer does not care which host you use, so the deployment mechanics are between you and the provider you choose. A few things to consider when moving into a production environment:
1. Register the production redirect URI. Add it to the same app client, on the same Settings → API page, and keep the localhost one alongside it so local development keeps working.
https://your-app.example.com/callback2. Set the configuration in the platform. The local file is for local development. Set its equivalents in your host's environment or secret configuration, keep staging and production values separate, and redeploy after changing them so every instance picks them up.
3. Generate a fresh session secret. Not the one from your machine, which has probably been through a terminal history or a screen share. Every instance has to be able to read the same session, so this value has to be set explicitly rather than generated at boot.
4. Run a smoke test against the deployed app. Open it, click Connect, approve on Buffer, and confirm you come back connected with your channels listed. Then create something, sign out, and reconnect. If the consent screen does not appear, compare the redirect URI your app is sending against the one registered in Buffer, character for character. That mismatch is the most common reason the flow fails.
See an example app
Buffer has a public repository called buffer-sample-apps which contains small example apps built on the Buffer API. Reference app-client-starter-app for a worked example demonstrating all of the core components of an app client built on top of the Buffer API:
- Buffer OAuth 2.0 flow with PKCE
- Configuration of access tokens
- Configuration of refresh tokens
- Interactions with the Buffer GraphQL API
- Running it locally and deploying it on Vercel
You can clone it, register a client of your own, configure with your credentials, and run it locally. Use it as an example or as a starting point for you or your AI coding assistant to build your own custom app.
Where to go next
- Authentication for the OAuth requests, code samples, scopes and error responses
- Posts & Scheduling for what a post can contain and what each network requires
- Hosting Media for what makes an image or video URL usable
- Data Model for how accounts, organizations, channels and posts fit together
If you build something on Buffer, share it with the Buffer developer community on Discord.